Managing ClearQuest Users
Managing GlearQuest Users and Groups
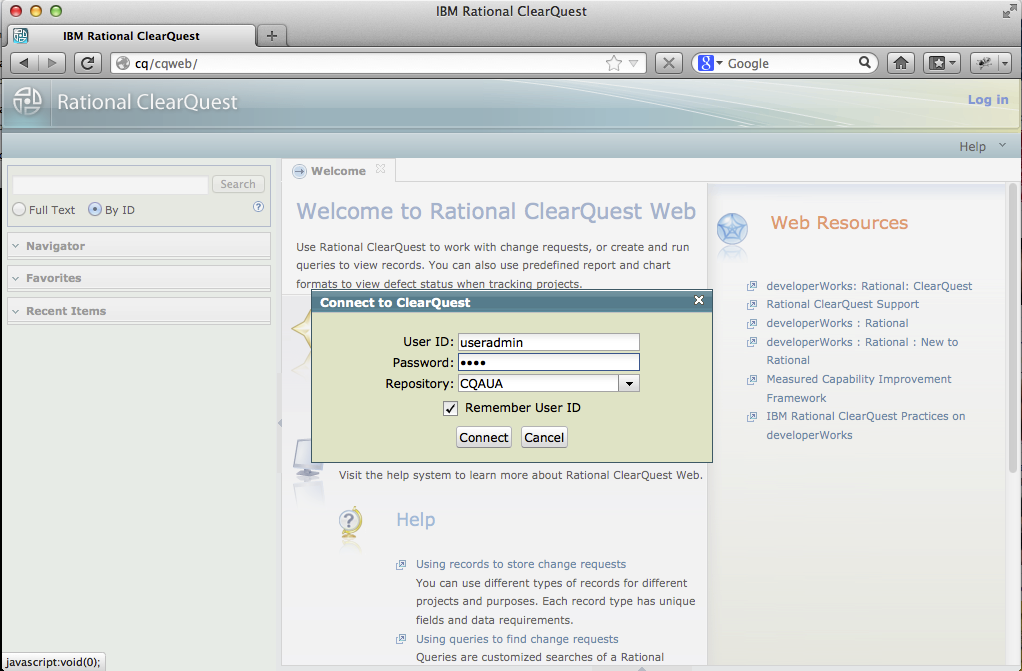
The User Administration tool is a ClearQuest database, and in order to start managing users you need to login to the database you created during the installation. Initially, only ClearQuest users with Super User or User Admin privileges are allowed to manage users and groups, but it can be changed. Please check User Administration Tool Configuration page for details.
Adding a User
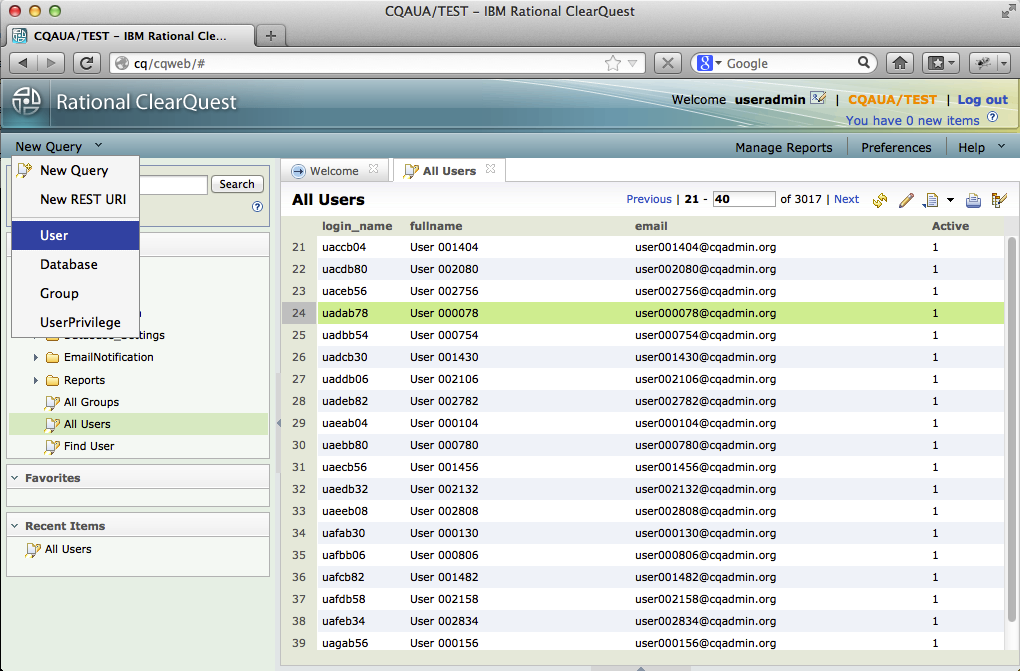
Click on New->User in the drop down list on the left.
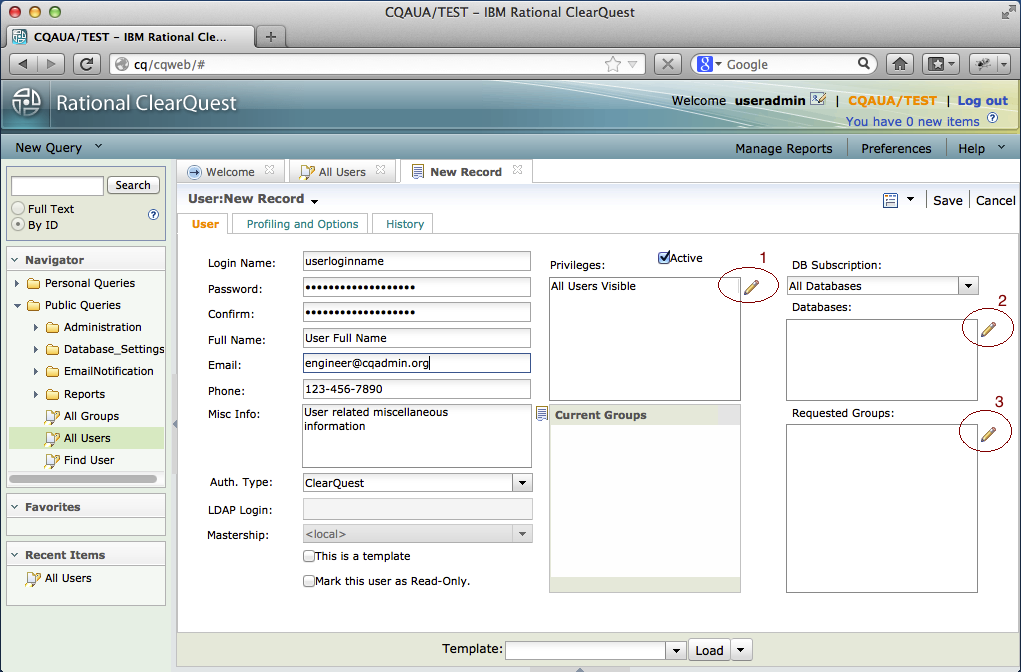
New user form will be opened for editing. Fill in the user information
- Login
- Password (In case of ClearQuest authentication, if left blank, a random password can be generated by setting CONFIG_GENERATE_PASSWORD property)
- Full Name
- Email address
- Phone
- Miscellaneous information (description)
In order to change user privileges (1), subscribed user databases (2), or user group membership (3), click on "Edit" pictogram right to correspondent field. Please note that the list of databases can be updated when database subscription is set to "Selected Databases" only.
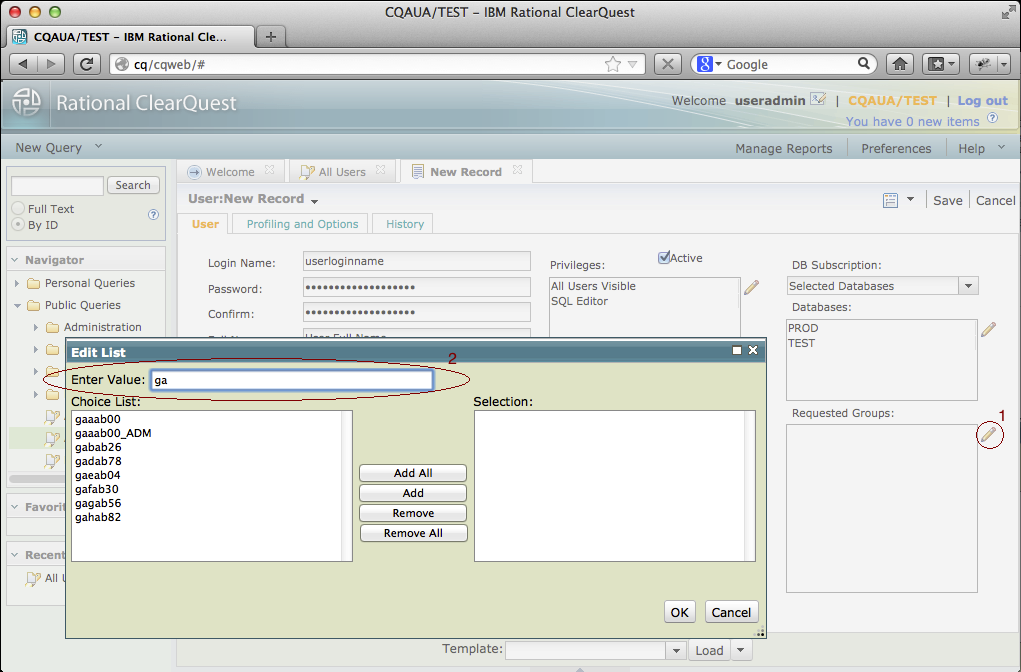
When you selecting a group from the list, you can limit choices by typing partial name of the group.
Select groups from the list and click "Add" to move them to the selection box. When you are satisfied with the selection, click "OK" button to close the Edit List form.
When you finished editing new user, click "Save" button on the form to save changes. After the user form is closed you can re-open it for review from "Recent Items" list on the left side of the workspace.
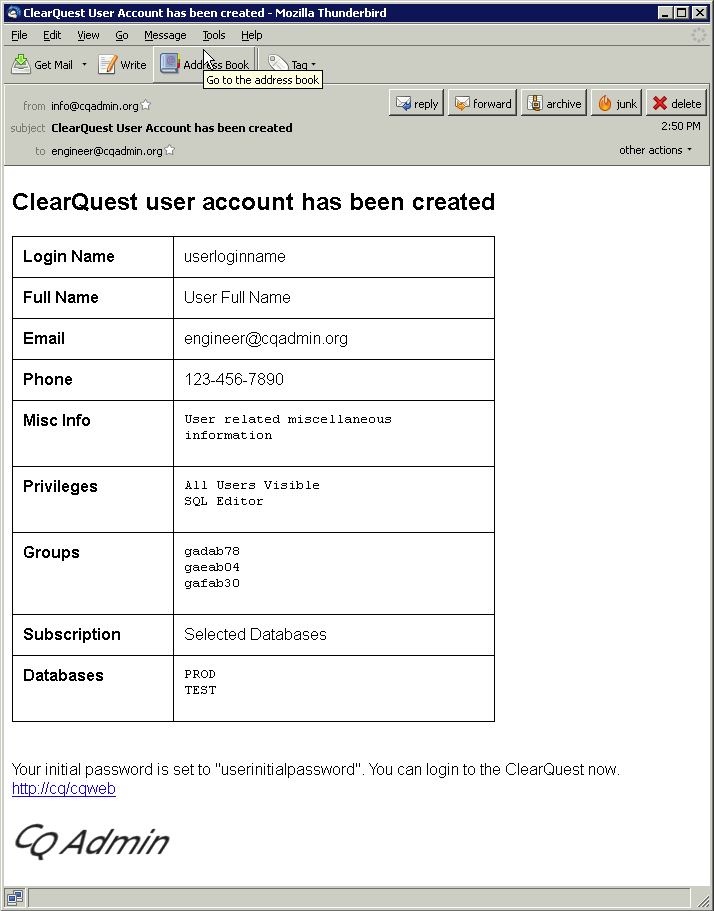
Email notification will be sent to the user providing details on the account, initial password (for ClearQuest authentication), and CQWeb URL.
Changing a User
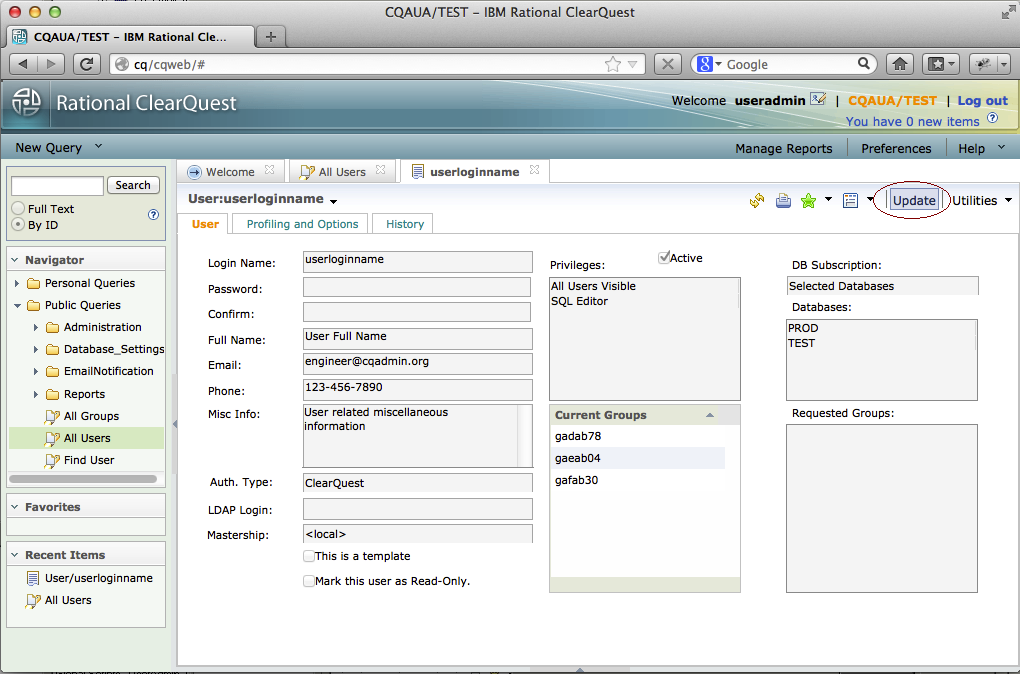
Find the user using Query in the Public Workspace and select it. The system will open the user form. Select action "Update" to start changing user information.
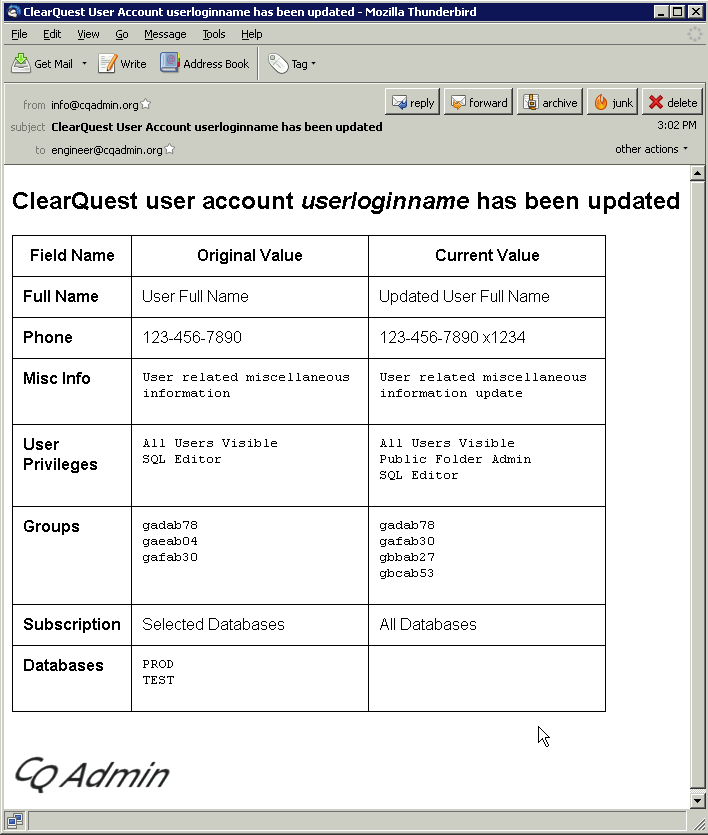
Change user information and click on the "Save" button to apply changes. The user will receive a email notification describing the change.
Adding ClearQuest Group
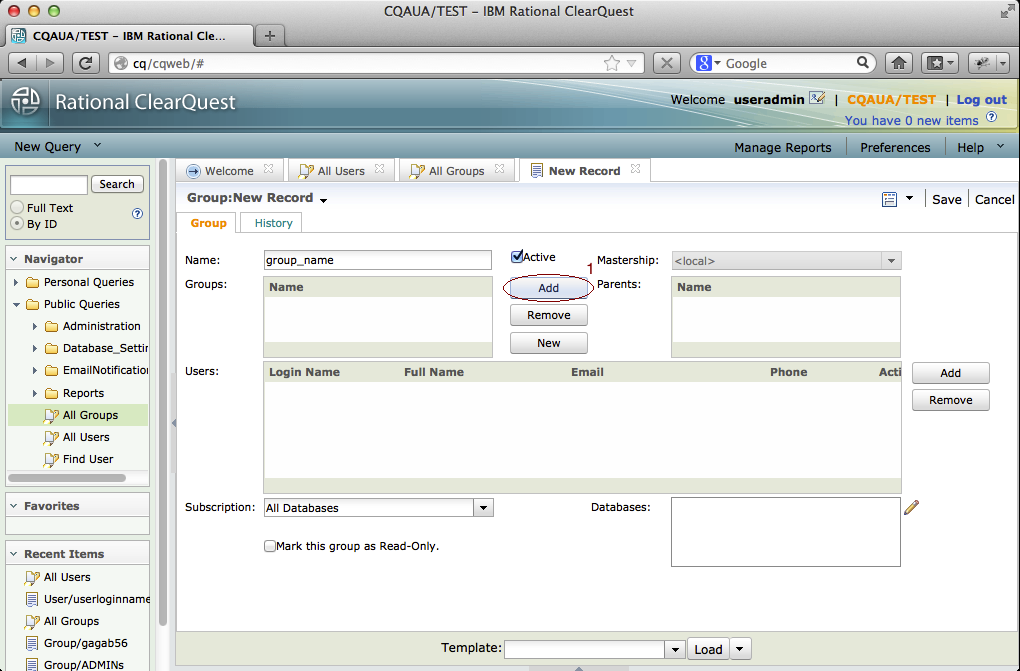
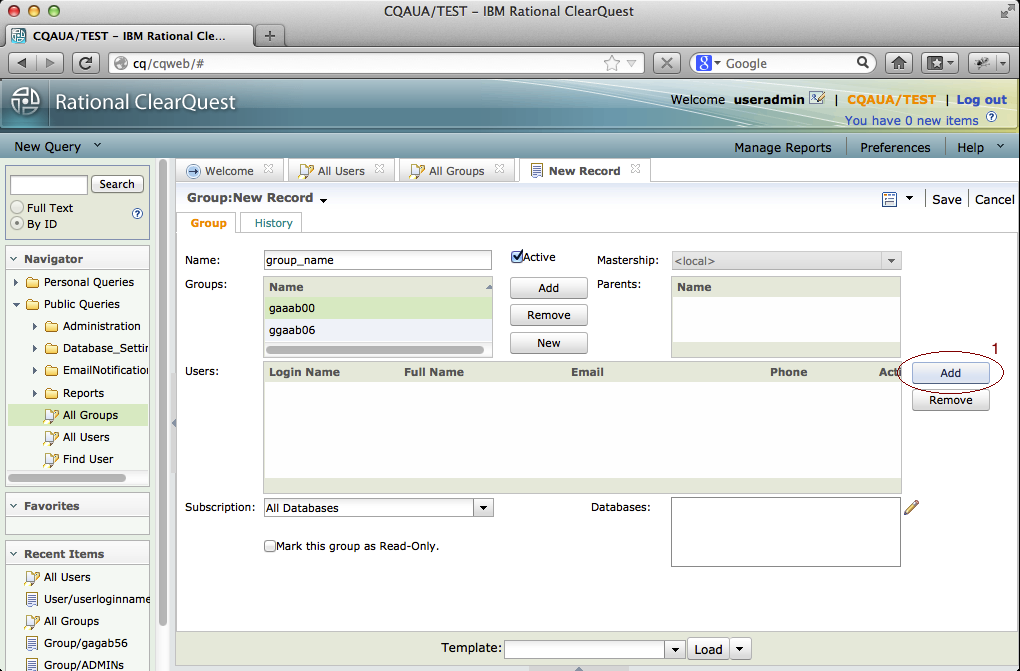
Select New->Group from the drop-down menu on the left side of the workspace. New Group form will be opened for editing.
Add Group members by clicking on "Add" button (1), and selecting groups from the list. You can search groups by name or by using any query from the ClearQuest workspace. Select groups to add and click "OK" to close the "Search and Select Records" dialog.
In order to add users to the group, click on "Add" button (1) right to the Users field. It will open "Search and Select Records" dialog.
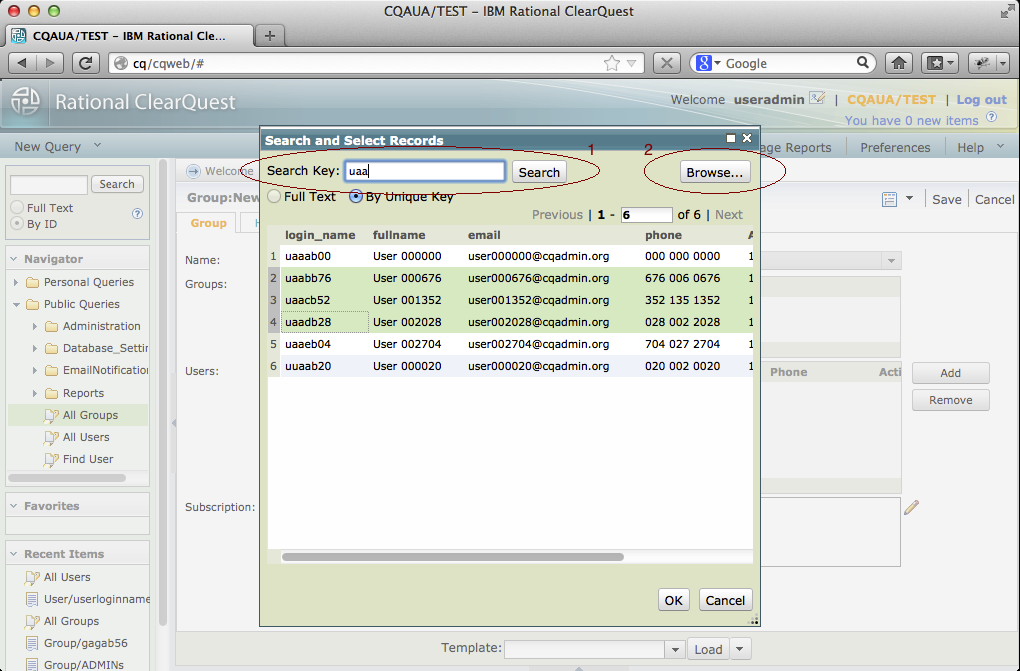
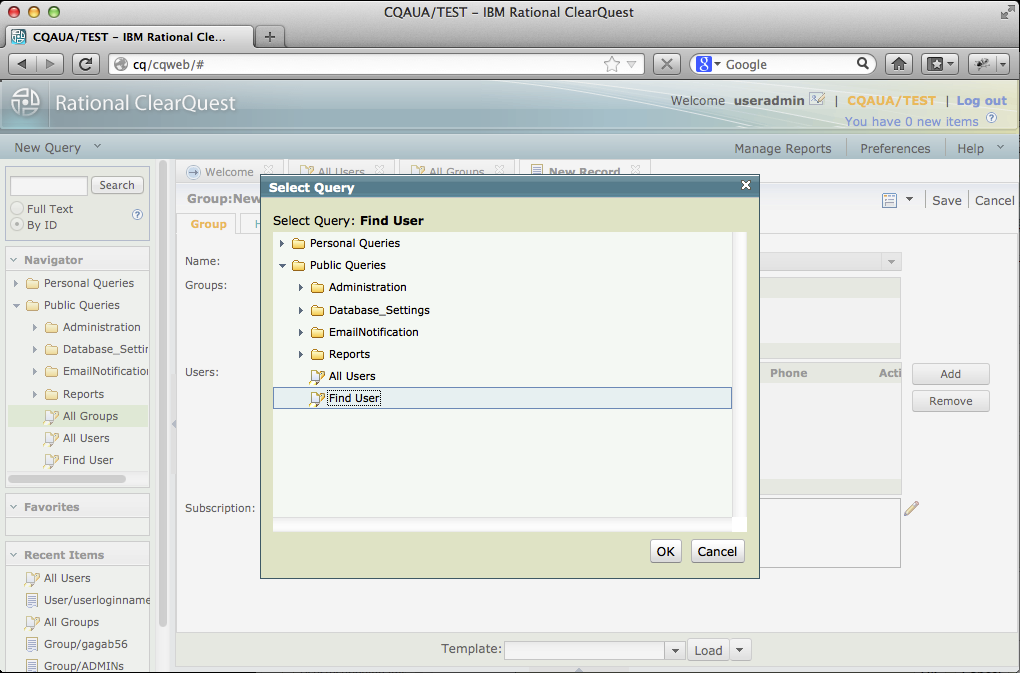
You can search users by login name (or partial login name) in the selection dialog (1), or click on "Browse" button (2) and use queries from the workspace for advanced search capabilities
When you finished editing group, click on "Save" button to commit changes.
Additional Information
The following links could be useful
